

Unit Coordinator & Lecturer
Dr. Naeha Sharif
Lab Facilitators
David Charkey
Jasper Paterson
Consultation Time
Thursdays, 3:00-4:00pm.Where: Room 1.05 in CSSE
and online (active in consultation hour)
News:
- [28 Feb'22] Welcome to CITS3003
Getting Started with OpenGL and 2D graphics
Objectives:
In this lab's exercises, you will- need to download and extract the libraries and OpenGL examples associated with the recommended text,
- learn how to compile and execute some 2D examples,
- make some small changes to the code of these examples,
- build an "absolutely minimal scene editor" (you won't believe how minimal!)
You are expected to complete this lab using the machines provided in one of the CSSE labs. For the online students, we are using Linux (Red hat) on the lab machines (but ubuntu should also be fine on your machines).
Downloading and extracting
- Create a directory (folder) in your home directory (e.g.
cits3003) to keep all your work for this unit. - Download
labs-examples.zipto this directory. - Extract the files from the zip file, either via the right-click menu in the folder or the terminal command:
unzip labs-examples.zip - Check that you now have a folder with all the examples for the various chapters of the recommended text.
- Create a directory (folder) in your home directory (e.g.
Building via make and executing
- Open a terminal window. Type in the terminal window:
The command above would change the working directory to the specified directory name. In the terminal window, type:cd cits3003/labs-examples/CHAPTER02_CODE/LINUX_VERSIONSls. You should see a number of sample C++ programs (.cppfiles) and a file with the nameMakefile. - Build the first example from example1.cpp via the command:
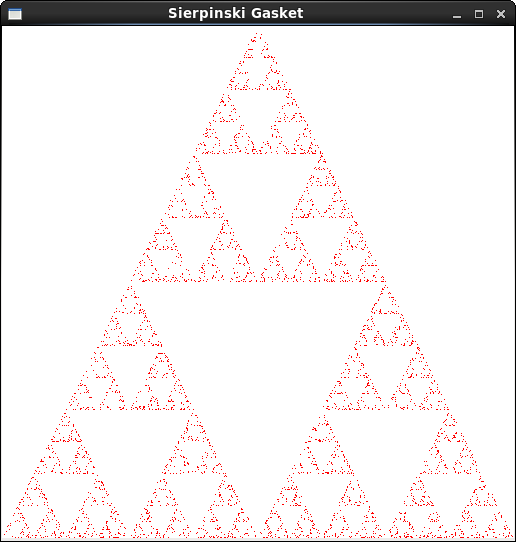
make example1 - Execute the first example via the command:
./example1 - Check that an OpenGL window like the following opens with many points drawn from the Sierpinski Gasket, and close it by presing Escape.
- Build and execute also
example2(and other examples if you wish).
- Useful
makecommands:make example1
builds example1(or other examples similarly) or rebuilds it if any files it depends on have changed, includingexample1.cpp.makemakes all programs in the current directory from their cppfiles.
make cleanremoves various intermediate and backup files.
make clobberremoves the built executables and various intermediate and backup files.
- Open a terminal window. Type in the terminal window:
Instantiating, building and executing your own OpenGL program
- Because of the way the Makefile works, you'll need to put your program in a similar
place alongside the examples (due to, e.g.,
../../Common/InitShader.cpp).
There's a few ways to do this -- Recommended is copying the entirelabs-examples/CHAPTER02_CODEdirectory tolabs-examples/lab1via:cd ~/cits3003/labs-examples
cp -r CHAPTER02_CODE lab1
cd lab1/LINUX_VERSIONS
make clobber - Copy
example1.cpptoq1circle.cppby typing:cp example1.cpp q1circle.cpp. - Edit
q1circle.cppwith your favourite Linux editor - if you don't have a favourite yet, just double click for the default or right click to select one. - Read through the code. For now, don't worry too much about all the OpenGL commands, you will encounter those in the lectures.
- Your goal is to modify this program (i.e., the
q1circle.cppfile) so that it generates the same number of points, but when a point is not inside a circle of radius 1.0 centred at the origin, i.e, (0.0,0.0), it skips it and chooses another point.
Hints:
- the function
length(p)will return the distance from a pointpto the origin. - you can do this just by adding two lines of code.
- the function
- If you need hints on geometry or programming, just ask in the lab.
- Build your program via
make, execute and test it, and verify that produces something similar to the following.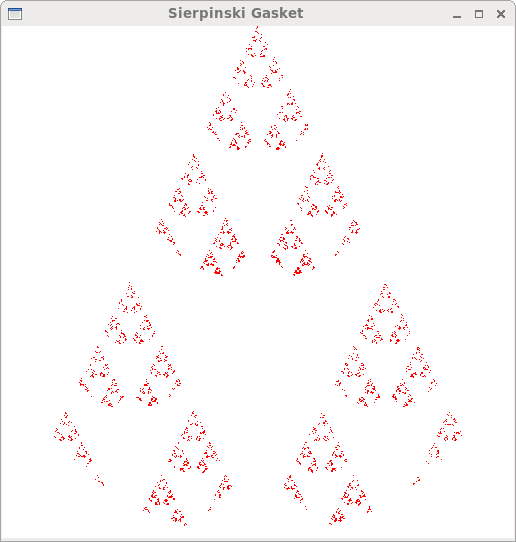
- Because of the way the Makefile works, you'll need to put your program in a similar
place alongside the examples (due to, e.g.,
Building an "absolutely minimal scene editor"
- Similarly make a second copy
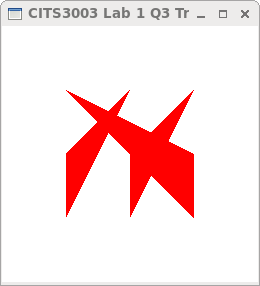
q2pointsScene.cppfromexample1.cppand modify it to implement an "absolutely minimal scene editor" that simply allows you to directly specify a "scene" of 2D points in thepointsarray similarly to the way theverticesarray is specified in the original code.Hint: you really don't need to write any code here, just list the coordinates that
pointsis initialized with, and remove the code that previously set the coordinates. - Arrange some points in a scene. Here's a sample arrangement (with
glutInitWindowSize( 256, 256 );):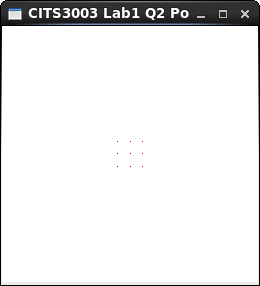
(Now all we need is solid shapes, colours, 3D, rotations, camera movement, complex shapes, perspective, lighting, materials, textures and animation. Oh, and editing without having to change the program.)
- Similarly make a second copy
Building an "almost absolutely minimal scene editor"
- Similarly make a copy
q3triangleScene.cppfromexample2.cppand modify it to implement an "almost absolutely minimal scene editor" that simply allows you to directly specify a "scene" of 2D triangles in thepointsarray.
- Arrange some triangles in a scene. Here's a sample arrangement:
(Now all we need is colours, 3D, rotations, camera movement, complex shapes, perspective, lighting, materials, textures and animation. Oh, and editing without having to change the program.)
- Similarly make a copy
Building a "mostly absolutely minimal scene editor" (optional)
- Use the remaining Chapter 2 examples to help you add colour and simple 3D to your triangle scene editor.
Sample Solutions
Department of Computer Science and Software Engineering
University information
CRICOS Code: 00126G
This Page
Website Feedback:
naeha(dot)sharif(at)uwa(dot)edu(dot)au